Several problems of cranes in steel structure workshop
- 16 Mar 2020
- steel structure

In modern industrial production, the application of crane has been widely developed. It not only reduces the labor force of workers to a certain extent, but also greatly improves the productivity, and even can complete a lot of work that cannot be done by manpower, meeting the requirements of modern production.
In recent years, with the rapid development of the construction industry, a large number of steel structure factory buildings are used in the factory construction. Due to the advantages of low cost, short construction period and simple construction technology, steel structure workshop is the first choice except for some special occasions.
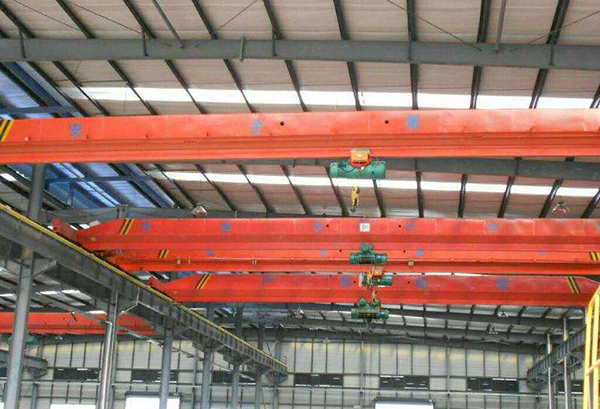
In view of the material characteristics of the steel structure workshop, the effect of vibration and sound absorption of the workshop is relatively poor. And the crane will produce certain impact when starting, lifting, walking and braking.Especially when the crane is running, it will produce certain noise and vibration. So it will cause the vibration of the crane beam and steel bent frame of the power house. If the vibration is severe, it will cause the fatigue damage of the structure, which will cause the deformation or crack of the power house itself, cause the damage of the power house, and even affect the normal operation of the whole factory. Therefore, it is necessary to do a good job in the inspection of the crane in use. The following two important parameters of the crane measurement examples, and to explore a number of issues.
1. Measurement method of crane main beam deflection
There are many methods to measure the deflection of the main beam. It is necessary to select the appropriate method according to the actual situation in order to accurately measure the results. At present, the main measuring methods are: laser distance measuring instrument method, level instrument method, theodolite method and total station method.
1.1 Laser distance meter method
To use the tripod of a level or theodolite, adjust the tripod according to the horizontal bubbles provided by the laser rangefinder to keep the upper surface of the tripod horizontal. Then place the laser rangefinder vertically on the tripod and align it with the corresponding point in the span of the main beam. Then measure the difference between the point of the main beam before and after the lifting load and the distance of the laser rangefinder, which is the deflection value of the main beam. This method has good repeatability, convenience and high accuracy, which is a good measurement method.
1.2 Level method
Adjust and erect the level according to the operation requirements of the instrument. Place the empty trolley at the span end. Place the tower ruler vertically at the middle and lower part of the main beam. Measure a data of the tower ruler with the level instrument, then lift a rated load in the span and place the tower ruler vertically at the original position. Let the level instrument read a data of the tower ruler again, the absolute value of the difference between the two data. It is the deflection value of the main beam. This method can measure many indexes with high precision, but it is affected by the height and site of crane.
1.3 Theodolite method
Adjust and erect the level according to the operation requirements of the instrument. Place the empty trolley at the span end. Place the tower ruler vertically at the middle and lower part of the main beam. Use the theodolite to measure a data when it is empty, then lift a rated load, and then use the theodolite to measure a data. The absolute value of the difference between the two data is the deflection value of the main beam. This method has a high measurement accuracy, but the workload of stick scale is large. Single beam crane is not suitable to stick, so this method is not suitable to use.
1.4 Total station method
The total station selects the mode of "edge measurement" and "suspended height measurement". This method can measure many indexes. The measurement method is advanced and the measurement accuracy is high. After calculation, if the measurement results meet the requirements, it will be judged as qualified.
2. Measurement of electrical insulation resistance
Electrical insulation resistance measurement is to test the insulation performance of components and electrical circuits, so as to avoid electric shock accidents. Generally, the insulation resistance of the 500V insulation resistance meter shall not be less than 0.5m Ω, or 0.25m Ω in humid environment. All electrical insulation resistance shall be connected together for measurement. Its measurement method is: 1. Open the main power switch on the ground of the crane, and assign special personnel to watch it so as to prevent other personnel from closing the switch, resulting in the electric shock hazard of the measuring personnel; 2. The power switch of the crane and the power switch of the control panel shall be in the closed state; 3. When the motor is directly controlled by the cam, the controller shall be in the closed state. When using the master controller and contact controller, make the contactor in the closed state; 4. Make the contactor of the main power supply in the closed state; 5. Use the measuring meter to measure the resistance of the main circuit or control circuit to the metal structure, and pay attention to the measurement, such as paint, rust or exposed metal luster on the metal structure, which should be removed with a file to prevent these The reason is that the measured resistance increases and the judgment is wrong.
3. Problems of crane in steel structure workshop
3.1 Noise, vibration, loose connection
At present, the commonly used method of vibration reduction is to put rubber inclined gasket in the bearing rail beam of crane and crane rail, so as to solve the poor vibration and sound absorption capacity of steel structure workshop. The gasket can absorb vibration, reduce noise and adjust the level of crane track. However, this structure reduces the connection stiffness between the crane rail and the rail bearing beam. When the crane is running, the rebound and compression of the gasket will loosen the connection of the crane rail, such as the hook bolt and the rail connecting plate. Therefore, the following measures should be paid attention to when installing the track: ①Using reliable anti loose materials such as solid double nuts; ② Strictly control the height of the rubber diagonal pad. If the height difference is large, first using the iron gasket to level, and then putting on the rubber diagonal; ③ The pre tightening force shall be applied to the hook bolt, the rubber inclined pad shall be pressed, the connection rigidity shall be increased, and the pre tightening force between the bolts of the distribution track shall be fixed with the torque wrench.
3.2 Rigidity measurement of main girder of crane
In the measurement, the data of main beam under rated load include deformation of bearing rail beam, deformation of crane rail, deformation of trolley rail, actual elastic deformation of main beam, clearance of crane wheel assembly, clearance of trolley assembly and deformation of lifting steel wire rope, etc. For the crane installed in the concrete structure workshop, the elastic deformation of the main beam is the largest, while the rail deformation and assembly clearance can be ignored. However, the rail bearing beam of the crane in the steel structure workshop will produce great elastic deflection under the rated load wheel pressure, which will be accumulated into the deformation measurement data of the main beam of the crane, resulting in great errors. So when the data measured by the traditional method is close to or beyond the critical value, the elastic deflection of the rail bearing beam should be considered when the large span rail bearing beam is equipped with the small span crane. Therefore, the following methods can be considered for re measurement: install three scales in the main beam span of the crane and the inner side of the two end beams, respectively use the weight preloading, measure the scale data of the crane under rated load and no-load conditions, and then calculate the actual elastic deflection value of the main beam under rated load: F = H - (H1 + H2) / 2, where h, H1, H2 are the midspan of the main beam The difference between the measured values of the ruler on the left beam and the right beam under rated load and no-load conditions.
3.3 Lateral rigidity and instability of rail bearing beam
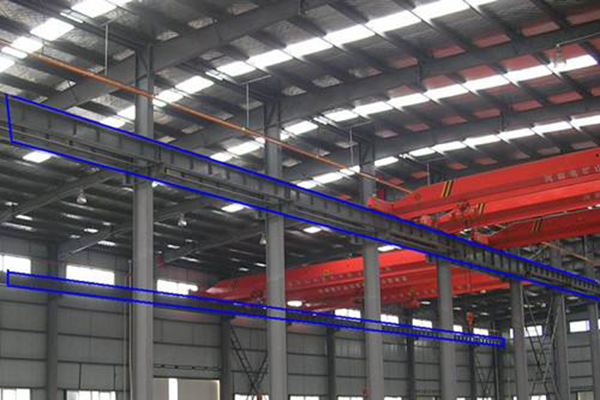
Most of the rail bearing beams used in the steel structure workshop are made of I-shaped steel. Its own fixing method is as follows: the rail bearing beam is supported on the bracket of the steel column, the bracket and the edge plate are connected under the beam with bolts, and the upper edge plate of the beam and the column are connected with the connection plate. When the crane swings along the longitudinal direction of the main beam or the crane trolley runs, it will have one rail bearing beam through the big wheel. If the lateral rigidity of the rail bearing beam is not enough to produce vibration or the fixation of the rail bearing beam is not stable, it will bring security risks to the operation of the crane.
At present, there is no clear requirement for the lateral rigidity of the rail bearing beam in the crane inspection regulations, and the inspection is difficult. Therefore, it is suggested that the lateral rigidity of the rail bearing beam should be verified by the rated load or no-load brake trolley in the inspection room.

4. Conclusion
In the process of crane inspection, different inspection methods should be selected according to different conditions and understood deeply. With the development of science and technology, the inspection technology of crane is constantly improving, and the manufacturing process and technology level are also constantly improving and developing. The inspection personnel should understand and master the existing inspection technology and learn new technology, master and understand the new process and new products, so as to serve the modern production better.